
Making a Blog with Fridge
Fridge can be used to create many different types of content. I'm going to show you how to create a dynamic blog that is deployed using the static site generator, Jekyll.
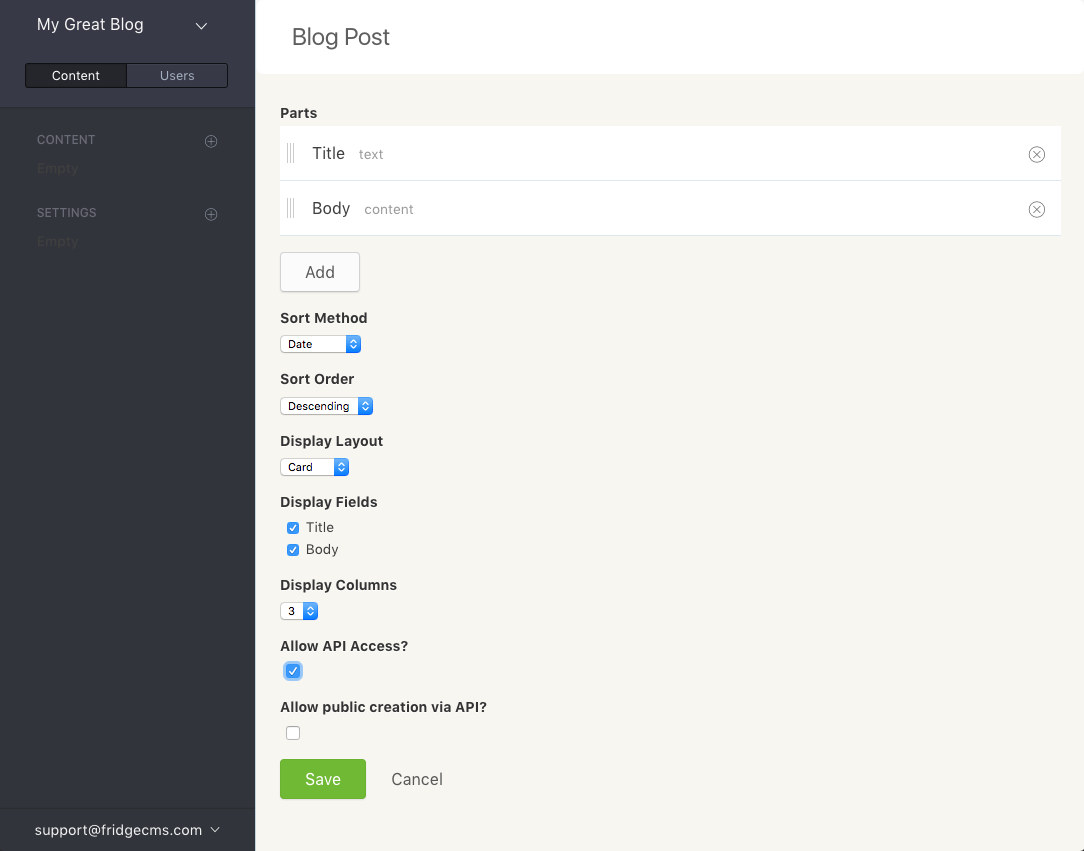
Create Blog Post Content Type
To get started, we'll create a new Fridge for our project. Once that is done, add a new content type called Blog Post. Here's a screenshot of what my content type looks like:
Create Comment Content Type
Next, we'll create a Comment content type to store comments that people leave on our blog posts. Here is a screenshot of what the Comment content type looks like:
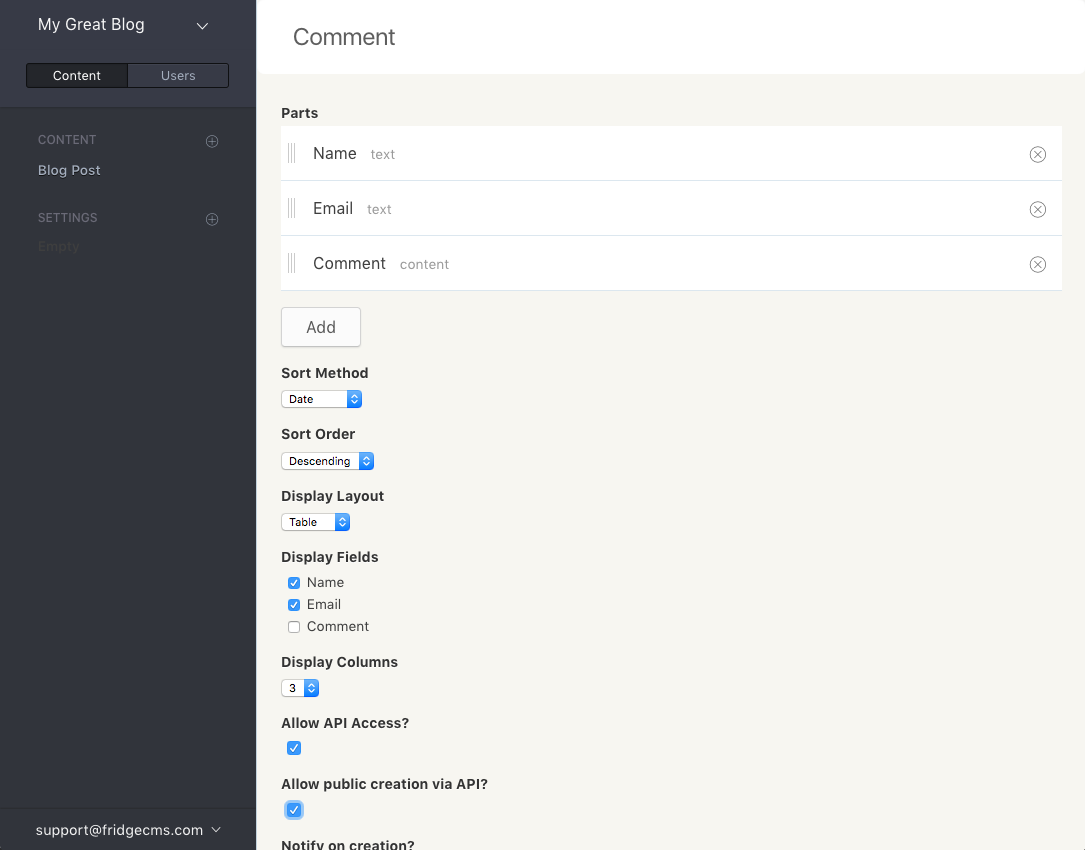
It is important to note that Allow public creation via API is checked. This allows users to leave comments using Fridge's public API endpoint.
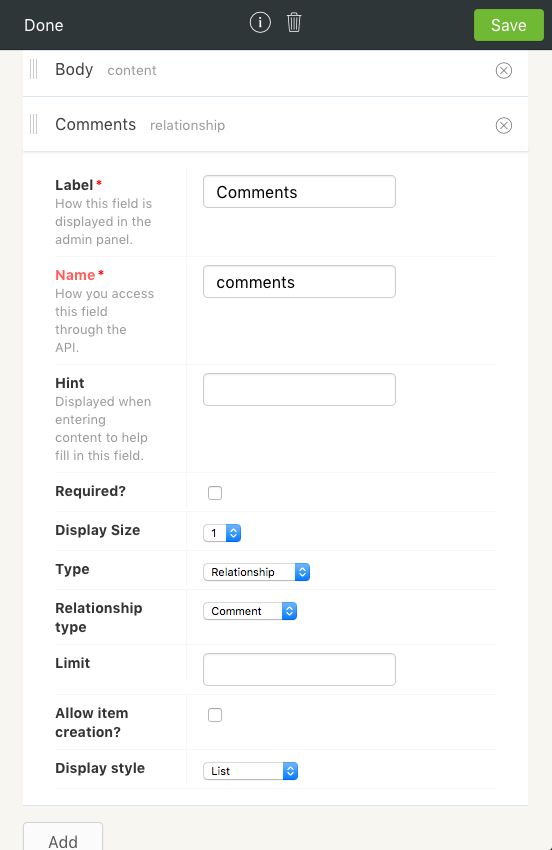
Create Relationship
Now that we have our two main content types, we're going to create a relationship between a Blog Post and a Comment. A Blog Post can have many Comments associated with it, so we'll make a Relationship part on our Blog Post content type that references Comments.
Once this is done, write some posts to have some content to work with.
Set up Jekyll
You can use anything to pull Fridge content, however there is already some great tooling to integrate Fridge content right into Jekyll and deploy new builds when content changes.
Create a new Jekyll project and add the jekyll-fridge gem to your Gemfile:
group :jekyll_plugins do
  gem 'jekyll-fridge'
end
Once the gem is added, configure the integration in `_config.yml`:
fridge:
  client_id: pk_xxxxxxxxxxx
fridge_collections:
  blog_post:
    path: ''
- fridge - is used to configure the API access keys
- fridge_collections - is used to dynamically create collection data that will be generated when the site is built.
Create a basic template
All we need to do to complete the integration is create a layout for the content type. Create a file _layouts/blog_post.html with the following:
<article>
  <h1>{{page.blog_post.title}}</h1>
  {{page.blog_post.body | markdownify}}
</article>
<div id="comments">
  {% for id in page.blog_post.comments %}
    {% assign comment = site.fridge.content[id] %}
    <div class="comment">
      <span class="author">{{comment.name}} ({{comment.email}})</span>
      {{comment.comment | markdownify}}
    </div>
  {% endfor %}
</div>
Deployment
Set up a site project with Netlify. Once you've created a site and linked it to your Jekyll site, head over to site settings and create a new incoming webhook.
After creating an incoming webhook, copy the URL and paste it into a new webhook on your Fridge settings.
Now, whenever content changes in Fridge, it will subsequently trigger Netlify to build and deploy your Jekyll site.